
If you’re replacing old laminate or worn-out tile, one of the first questions you probably have is how are granite countertops installed and what actually happens on install day. Fair question. Granite is heavy, expensive, and not the kind of material you want handled by guesswork. The good news is the process is pretty straightforward when the job is planned correctly.
Most homeowners picture installation as a one-day event where the crew shows up, drops in the stone, and leaves. The reality is that a good granite job starts well before the slabs ever reach your house. Measuring, stone selection, fabrication, and site prep all matter. If any one of those steps gets rushed, you feel it later in the form of bad seams, overhang issues, sink problems, or cabinets that take on more weight than they should.
How are granite countertops installed from start to finish?
The short answer is this: the space is measured, the granite is selected, the slabs are cut and polished, the old tops come out if needed, the cabinets are checked for level, and then the stone is set, seamed, secured, and finished. That sounds simple, but each part has a purpose.
For homeowners around Indianapolis, Carmel, Fishers, Greenwood, Avon, and Westfield, the biggest thing to know is that installation quality starts with process quality. If you’re getting vague pricing, no one is helping you choose stone, or the company is skipping details about templating, that’s usually where trouble starts.
Step 1: Measuring and templating the space
Before any granite gets cut, the installer needs accurate measurements. Some companies start with rough dimensions to build a quote, which is normal. But rough numbers are not what fabrication runs on. Final measurements have to account for cabinet layout, wall angles, sink placement, cooktop openings, backsplash height, and overhangs.
Templating is the step that turns your kitchen into a cut plan. Depending on the company, this might be done digitally or with physical templates. Either way, the goal is the same: get exact dimensions so the finished pieces fit the room as it actually exists, not how it looks on a builder sketch.
This is also the stage where details get locked in. If you want an eased edge, a larger island overhang, a particular sink reveal, or a full-height splash behind the range, those decisions need to be made before fabrication starts.
Step 2: Stone selection matters more than most people think
Granite is a natural stone, so no two slabs are exactly alike. That matters because the slab you pick affects movement, color variation, seam placement options, and the overall look of the room. Pictures online are helpful, but they are not enough if you want to know what your counters will really look like.
This is why hands-on slab selection is such a big part of a good countertop process. Looking at the actual stone lets you see whether the pattern is quiet or dramatic, whether there are mineral deposits you like or don’t like, and how much variation to expect from one section of the slab to another.
There’s also a pricing angle here. Some buyers assume they have to purchase an entire slab even if their kitchen only uses part of it. That is not always the case. A square-foot pricing model can make a lot more sense for smaller kitchens, rental updates, or flip properties where budget control matters.
What happens before granite countertop installation day?
A lot, and that’s a good thing. Once the stone is selected and the template is approved, the slabs go into fabrication. This is where the granite is cut to size, polished, edged, and prepared for sink and cooktop openings.
Step 3: Fabrication in the shop
Fabrication is where raw slab becomes a countertop. The shop cuts each section based on the template, then finishes the exposed edges and polishes the surface. Openings for sinks, faucets, and appliances are also cut during this phase.
This step has to be precise because granite doesn’t give you much room for improvising on site. Installers can make minor adjustments at the house, but they should not be doing major reshaping in your kitchen because a template was off.
Fabrication also determines where seams will go. Seams are normal in many kitchens, especially on long runs, L-shapes, and large islands. A good fabricator places them where they are structurally smart and visually less obvious. A bad seam plan can draw the eye immediately, even if the stone itself is beautiful.
Step 4: Preparing the cabinets and removing old countertops
Before granite can be installed, the cabinets need to be ready to carry the load. Granite is heavy. Most standard cabinets can support it, but they still need to be securely installed, properly aligned, and level enough for the stone to sit correctly.
If old countertops are being removed, that usually happens before or on installation day depending on the project. Plumbing and disconnects may be part of that process if you’re replacing a sink. If you’re keeping an existing backsplash, that can complicate removal, so this is one of those areas where it depends on the house.
Installers will also check for problem spots like uneven walls, weak cabinet corners, unsupported dishwasher openings, or islands that need extra bracing. This prep work isn’t flashy, but it prevents cracked stone and poor fit later.
Install day: setting the granite in place
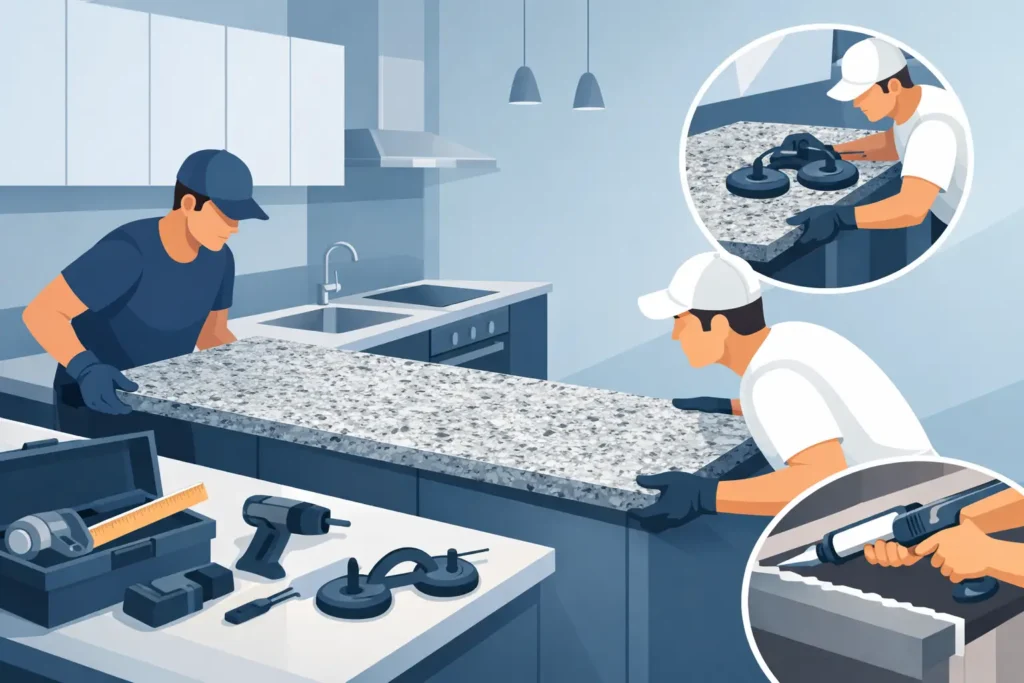
This is the part homeowners think of most, and yes, it is a big day. Granite pieces are brought in carefully, usually by a crew using carrying clamps and pads to protect both the stone and your home. Because the pieces are heavy and sometimes awkward, a clear path into the kitchen helps more than people realize.
Step 5: Dry fitting the pieces
The crew usually starts by setting each piece in place without fully securing it. This is the dry fit. They are checking wall fit, seam alignment, overhang depth, and sink positioning. If a wall bows a little or a corner needs minor scribing, that gets handled here.
Dry fitting is also when the installers confirm that all fabricated pieces came in correctly and sit where they should. If something is wrong, it is better to catch it before adhesive and seam work begin.
Step 6: Leveling, shimming, and securing the tops
Once the fit is confirmed, the installers level the stone as needed. Cabinets are not always perfectly flat, especially in older homes. Small shims may be used to create proper support and prevent stress points under the granite.
After that, the tops are secured. Granite countertops are usually held in place with a combination of gravity, adhesive, and strategic support. They are not typically screwed down through the stone. The adhesive is used where needed to stabilize the pieces and keep them from shifting.
Step 7: Joining the seams
If your kitchen has more than one piece of granite, seams will be bonded and finished during installation. The crew uses color-matched epoxy or resin to join the sections, then levels the seam to make it as smooth and tight as possible.
A common question is whether seams disappear completely. No, not completely. A quality seam should be neat, secure, and not distracting, but you will usually still be able to find it if you know where to look. That’s normal. What you don’t want is a wide gap, uneven height, or poor color match.
Step 8: Sink mounting and final details
Undermount sinks are typically attached from below the granite using brackets, anchors, or adhesive systems designed for stone. The sink reveal is checked, the faucet holes are confirmed, and any included backsplash pieces are set in place.
Then the crew cleans up the installation area, removes excess adhesive, and makes sure everything is sitting correctly. If the granite requires sealing, that may happen at this point or shortly after, depending on the material and finish.
After installation: what to expect next
You may need to wait a short period before reconnecting plumbing or using certain areas, depending on adhesives and sink mounting methods. That’s normal. Your installer should tell you exactly when the countertops are ready for regular use.
Natural granite may also need periodic resealing over time. Not every granite behaves the same way. Some colors and patterns are denser and less absorbent than others, so maintenance depends on the specific stone you choose. That’s another reason working with someone who actually explains your options is worth it.
If you want the smoothest experience possible, the best install jobs come from a company that handles the whole chain clearly – measurement, selection help, fabrication coordination, install, and the follow-up details. That’s the difference between a countertop project feeling stressful and feeling manageable.
At Granite Networks Indy, that’s exactly how we approach it. We help customers skip the showroom runaround, choose the right slab, understand the real price, and get the job installed the right way without a bunch of confusion in the middle.
Granite installation is not magic, but it is a process where details matter. When the measurements are right, the fabrication is clean, and the install crew knows what they’re doing, you end up with a top that looks sharp, fits right, and holds up for years. That is what you should expect from the start.